19 Feb HOW TO TILE A BATHROOM
If you are tiling an existing bathroom, remove all the old tiles, wallpaper, flaky paint, loose material etc. & prepare the wall with a stabilising primer. Remove all of the sanitary ware, (wash hand basin, toilet, shower enclosure) when possible so that the ware sits against the tiles when finished. Leave the bath in place unless you are replacing it.
Whatever you do make sure you leave a toilet in use for the family or else you will be in trouble! You can always leave the toilet bowl in place & just remove the cistern – make sure to turn the water off before removing any items.
I would recommend painting the ceiling at this stage with a paint that is suitable for bathrooms. Now measure for the centre of all walls both horizontally and vertically. There is one golden rule to use when tiling which my father told me years ago …….
“STAND BACK AND MAKE SURE IT LOOKS GOOD TO THE EYE”!
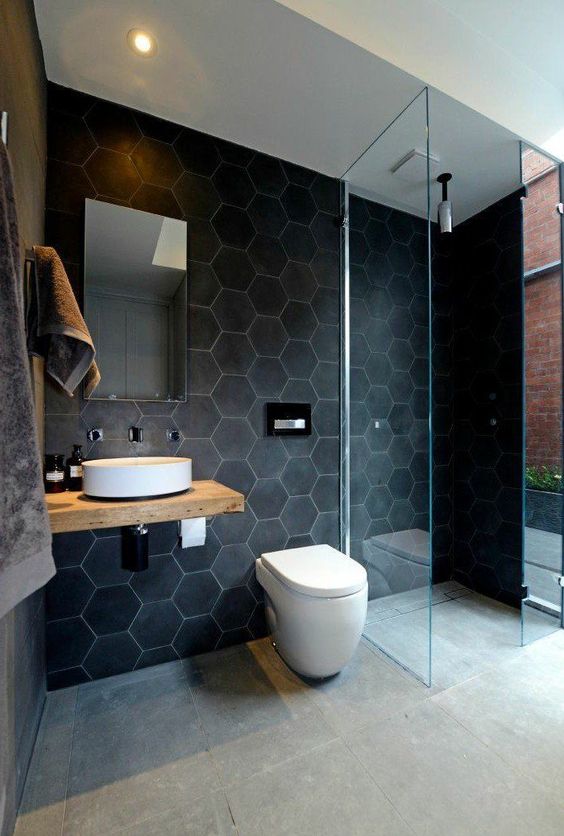
If you are using a border tile it is vital that you place the tile at the best possible position to suit the window, the sanitary ware and the ceiling. The border tile may run below the sill, above the sill or even sit on the window sill, this all depends on the height your window is from the floor and the number of full tiles from the ceiling until your chosen border tile height. I like to see a tiled sill in place of a wooden or pvc sill but this is down to the personal preference of the householder.
I believe it is best to have a full tile at the ceiling and put the cut tiles to the bottom of the wall because when you enter the bathroom you are more likely to look up than down & you can disguise the cut tile with a pvc skirting board or use a cut floor tile as a skirting. The cut tile skirting is achieved by using a floor tile approx. 100mm deep (depends on how the tiles work out) to act as the skirting board. Also try not to have small cuts going into the corners. Bear in mind that some ceilings are not level & you may need to allow some tolerance here.
Mark the centre of the wall and place the edge of the wall tile on this mark, now measure the tiles up to the corner by “walking” the tile across the wall. What size of a cut are you left with? If you find it is relatively small, go back to the centre mark again. Now, place a mark on the centre of the tile itself, place the centre of the tile on the centre mark of the wall and again “walk” the tile into the corner. Does this look better than the last time?
When you are working on a window wall, again, centre the wall and measure the tiles going into the corner and do the same as you did on the other wall. Also bear in mind the cuts at the window openings. Try not to have a small cut tile around the window opening. Also remember to allow for the tile edging strips. It is better to spend time at the setting out stage rather than flying ahead and then realising you would have been better starting at a different point on the wall! (marry in haste… repent at your leisure, as many people have found out!)
Once you have decided on where you will start you can begin to lay the tiles vertically until you reach the ceiling. Using either the buttering method or the notched trowel method place the 1st tile at the starting point and press firmly. Now butter another tile and place this one on top of the first tile again pressing firmly. Don’t forget the tile spacers. Proceed with the tiles vertically until you reach the ceiling.
You may have to adjust the tiles slightly at this stage to make sure everything fits nicely. Now get your spirit level and make sure the tiles are plumb (vertical). It will help to fix a batten vertically against these tiles when you are happy to keep them plumb. When tiling, it is advisable to use spacers in the vertical joints as well as the horizontals. Remember always stand back and look at your work. You can always adjust tiles before they have set. When you have laid a couple of courses of tiles all around the room & they have set, (next day) you can remove the horizontal batten and fill in the gap left to the floor with your cut tiles. When tiling a course around the room always make sure you are level as you do not want to finish tiling & find that you are 1/2″ out of level. Your level is going to be your best friend when tiling!
Make sure you clean any adhesive off the tile face & in between the tiles as you go with a sponge and water. It is much easier remove adhesive when soft than when it has set! You need to let the tiles set for 24 hours and then grout them. Before grouting remove the spacers!
To grout tiles put approx. 25mm – 50mm (1” – 2”) of water into a clean bucket and add the grout stirring until you achieve a creamy consistency not too thick & not too thin! Do a small section at a time e.g. 1800mm x 1800mm (6’ x 6’) work the grout into the joints with a squeegee until full. Wait approx. 10 mins or until the grout begins to dry and then sponge the tiles clean, at the same time you can smooth the grout joints with a grout finishing tool.
When you are more confident you can try a larger area, keeping an eye on the setting time of the grout. Remember to always wash the tiles as you go. Generally 2 washes with cold water will remove the majority of the grout off the face of the tiles. You will notice after washing the tiles a light dust will form on the face of the tiles. Wash once more with hot water, when this has dried, “polish” (rub) the tiles with a soft cloth (old tee towel or similar) to bring a shine to your tiles.
If you are tiling onto a smooth plastered wall (hardwall/ skimcoat) I would suggest if possible you fix a tile backer board to the wall as the tile adhesive may well “pull” the skimcoat off the wall in time making your tiling job a waste of time & energy. The best wall surface to tile onto is a sand & cement plastered wall. If you are self building or doing an extension make sure the plasterer only does sand & cement plaster in the bathroom where you want to lay tiles.
If your wall is very uneven you would do well to have it straightened / made flat as this will make sure the full tile will stick to the wall as it is flat. Most walls I have come across have been anything but straight.
You can “butter” the back of the tiles although this method is not considered best practise. This is where using a pointing trowel, you place adhesive on the tile itself in 4 or 6 equal dabs (depending on the size of the tile) approx. 1” (25mm) in from the edges. The reason for buttering rather than using the notched trowel method is that on uneven walls you can adjust the tile corners to sit flush to the next tile so making your tiling job look a lot neater rather than letting the tile follow the wall & having very little adhesive touching the back of the tile. I have removed a lot of tiles from walls that have had very little adhesive on them. I myself have tiled bathrooms in my own house with the “buttered” method & have never had any trouble.
Let’s recap. 1) Prepare the walls. 2) Paint the ceiling. 3) Centre the walls 4) Set out the tiles, taking into account the border tile if used. (Some tiles also have a pencil border which is generally placed just below the tile down from the ceiling). Again as long as it “looks good to the eye” you should be ok!
Handy tip: Do a dry run….Place the tiles on the floor in the living room, now put a tile against the skirting board(skirting board acts as the ceiling) now place the tiles down from the skirting board using your tile spacers as you go, put your border tile or pencil border in your chosen positions. Measure the height from your bathroom floor to the bathroom ceiling and transfer this measurement to your dry run. This will give you the height to fix a level timber batten (2” x 1”) on the wall to support the wall tiles while they are setting. Most ceilings are around 8’ (2400mm) high but can & do vary in different properties. You will find that you will be slightly out but you can always raise the bottom tile with spacers or cardboard
Tools required: Pointing trowel / notched trowel, spirit level, timber battens, tile cutter, tile nippers, hammer, steel nails / screws, sponge and cloths. Wet tile cutter or angle grinder for cutting shapes in tiles. Please remember to use the appropriate protective equipment when undertaking any DIY building work. If you have any comments, questions or would like to see a particular subject discussed, please email your requests to steve@snagliststeve.ie Happy tiling!
No Comments